

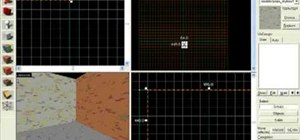
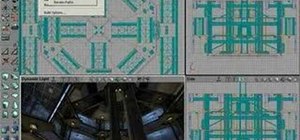
This tutorial is a step by step guide on how to make maps for Team Fortress 2 (part of the Half Life 2: Orange Box) using Steam's Hammer program. Topics covered include:
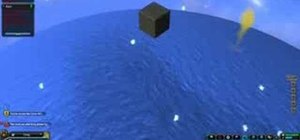
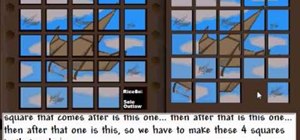
Creating brushes to make a simple room
Making a skybox
Creating respawn areas
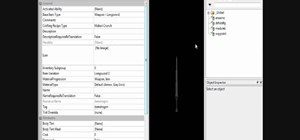
Creating a resupply locker, trigger areas, and heatlh and ammo packs.
Just updated your iPhone? You'll find new emoji, enhanced security, podcast transcripts, Apple Cash virtual numbers, and other useful features. There are even new additions hidden within Safari. Find out what's new and changed on your iPhone with the iOS 17.4 update.
1 Comment
Great work on these tutorials. Gave me a great head start, although I am stuck on a couple of things.
First, when you apply the trigger texture to your box selection, it seems to convert that whole assembly of walls into one group. That is, the whole thing turns into a big orange box with even the doorway being orange.
When I apply the texture, it just turns each wall orange and I can't select everything as a whole. It's like each block (wall) is a separate trigger. And, my doorway is not covered by the orange selection box as yours was.
Any idea why that happens?
My other problem is that after I've applied a trigger texture to a selection, any new brush that I create has the trigger texture already applied by default. How can I turn the default back to normal?
Sorry for the long questions. Any help would be appreciated.
Share Your Thoughts